¶ Annotation Editor
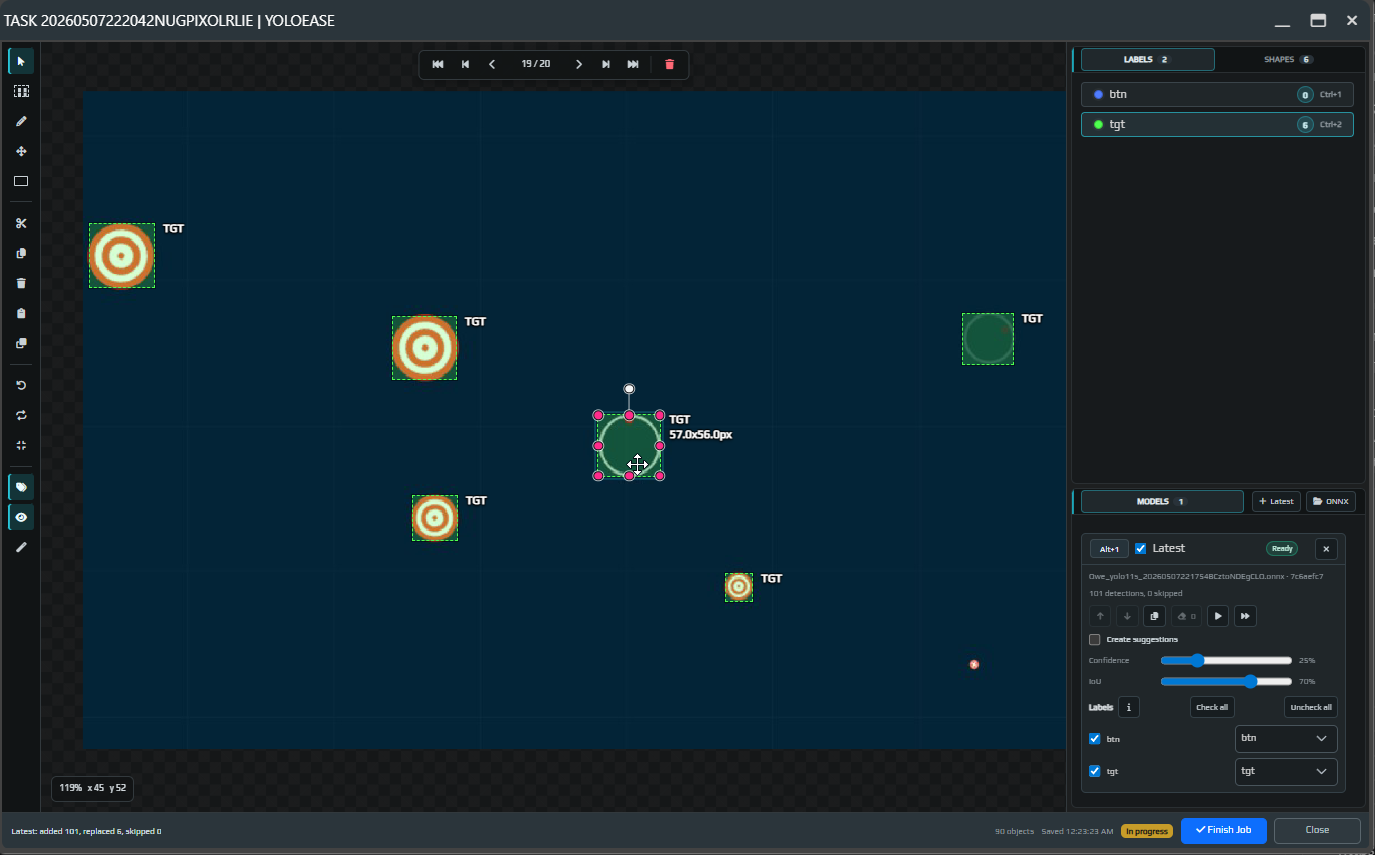
The annotation editor is a separate window where you label frames inside a task. It includes an image area, labels, a list of boxes, a model panel, and a status bar at the bottom.

¶ Main areas
On the left is the toolbar: select, area selection, move, rectangle tool, delete, copy, paste, undo, redo, reset zoom, visibility toggle, and tools for model suggestions.
In the center is the workspace with the current frame.
On the right is the properties panel:
Labels— the list of labels and their hotkeysShapes— objects on the current frameModels— models used for auto-annotation
At the bottom you can see the object count, task status, and the Finish Job and Close buttons.
¶ Manual annotation
For object detection, the model learns from rectangles. Select a label, enable the rectangle tool, and draw the box as tightly as possible around the object.
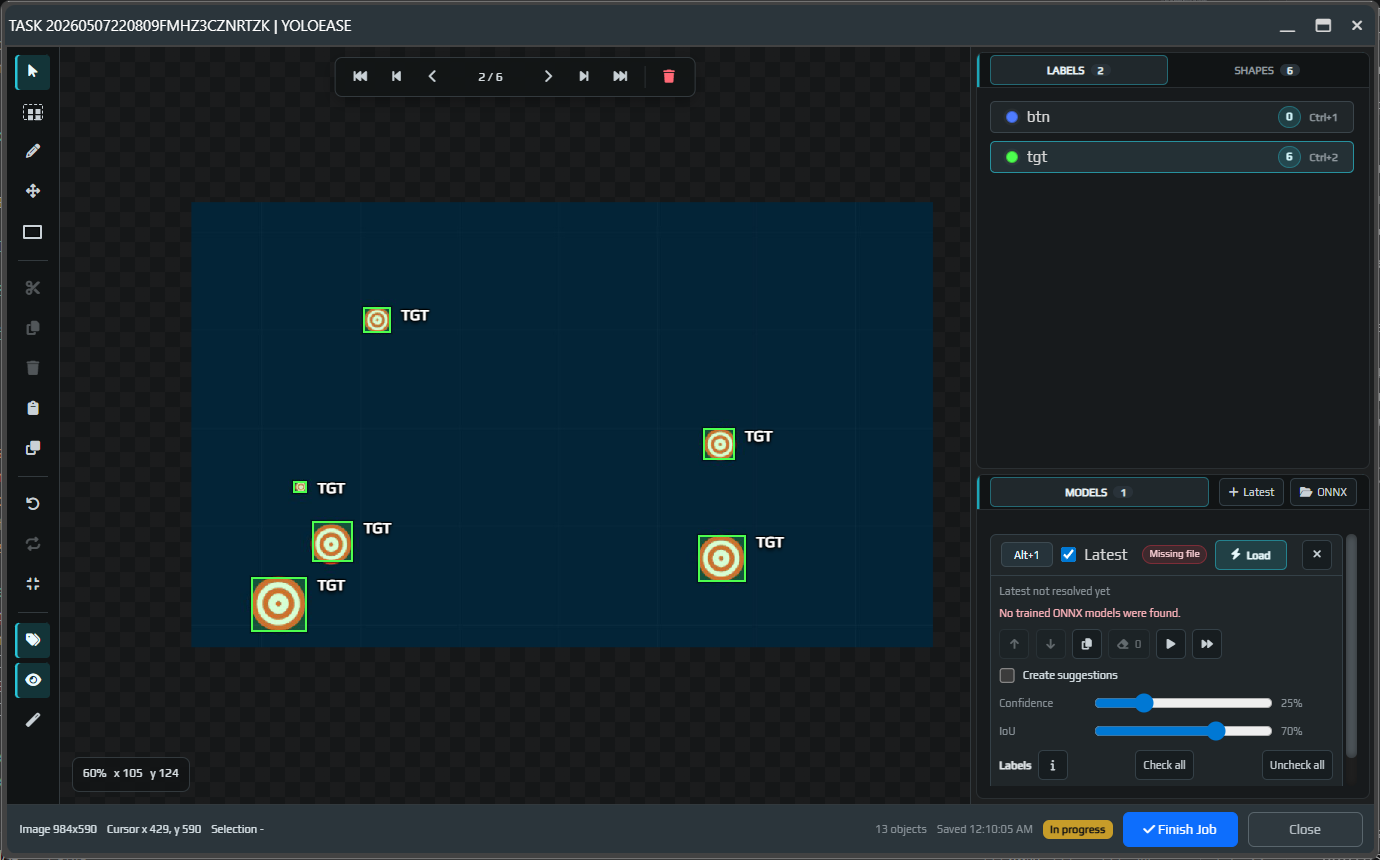
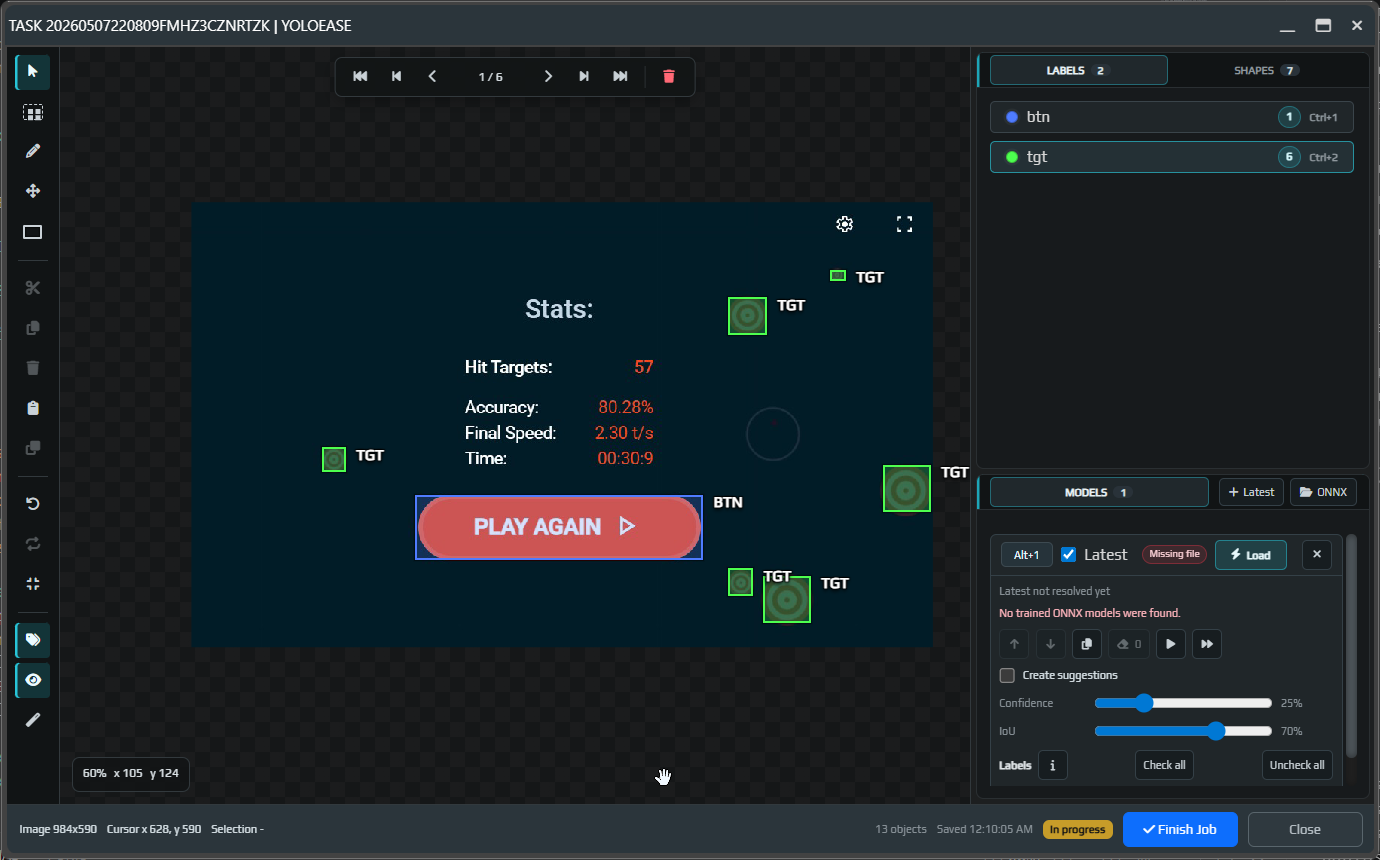
If an object should lead to different behavior in EyeAuras, use a separate label. In the demo, targets are labeled as tgt, while the PLAY AGAIN button is labeled as btn.
¶ A fast workflow
Annotate class by class. First select one label, for example tgt, and go through all targets in the frame. Then switch to btn and annotate the buttons. Constantly jumping between classes on the same frame is usually much slower.
If you are annotating a class on a frame, annotate every visible instance of that class. Otherwise the model gets mixed signals: one tgt is treated as a target, while an identical tgt next to it is treated as background.
Use copy and paste aggressively. It is often faster to select an existing box, press Ctrl+C, Ctrl+V, place the copy nearby, and adjust it than to draw a new box from scratch.
For sequential frames, use Ctrl+B: the editor will copy annotations from the previous frame to the current one. This is especially useful for video, where the object moved a little but its shape and size barely changed. After copying, remove objects that disappeared and fix boxes that shifted.
If you assigned the wrong class, do not redraw the box. Select the object and choose the correct label from the list on the right or use the Ctrl+1..9 hotkey. Ctrl+N switches the selected object to the next label.
¶ Annotation quality
A box should tightly cover the visible part of the object and avoid extra background. For YOLO, this matters more than perfect symmetry: the model learns from the pixels inside the box and around it.
For overlapping objects, decide on a policy in advance and apply it consistently in all similar cases. For screen automation, it is usually better to annotate only what is actually visible and actionable. If an object is almost fully covered and cannot be clicked, do not annotate it as a normal target. If a partially covered object still matters, annotate the visible part consistently in all similar frames.
YOLO can detect solid-color objects if there is some stable visual cue in the frames: shape, color, contrast, position, or surrounding context. But add negative examples with similar colors, otherwise the model may start seeing the target in any similar patch.
Small objects can also be detected, but they still need enough pixel size after all transformations. If an object ends up being only a few pixels wide, it is usually better to reduce the capture area, record data from a more precise EyeAuras region, increase the training resolution, highlight the object with effects, or filter out detections that are too small inside EyeAuras.
Empty frames are useful too. If there is no target in a frame, leave it without boxes and finish the task. These frames teach the model not to trigger on menus, pauses, backgrounds, and similar but incorrect objects.
If an object looks like a target but cannot be clicked, choose one policy and stick to it: either never annotate such objects, or create a separate label such as btn or ignore. The worst case is annotating the same situation as a target sometimes and leaving it as background other times.
¶ Hotkeys
| Keys | Action |
|---|---|
N |
Start creating a rectangle if the project has labels. |
M |
Enable rectangle selection. |
L |
Enable free selection. |
Escape |
Cancel the current operation and clear the selection. |
Q, Delete, Backspace |
Delete the selected object or model suggestion. |
Ctrl+A |
Select all boxes on the current frame. |
Ctrl+C, Ctrl+X, Ctrl+V |
Copy, cut, or paste the selected boxes. |
Ctrl+B |
Copy boxes from the previous frame to the current frame. |
Ctrl+1..9 |
Select a label or change the label of the selected object. |
Ctrl+N |
Switch the selected object to the next label. |
Ctrl+Z |
Undo the last change. |
Ctrl+Y, Shift+Ctrl+Z |
Redo the last undone change. |
D, F |
Go to the previous or next frame. |
C, V |
Step backward or forward. |
R |
Reset image zoom and pan. |
Alt+N |
Run the first available model on the current frame. |
Shift+Alt+N |
Run the first available model on all task frames. |
Alt+1..9 |
Run the selected model on the current frame. |
Shift+Alt+1..9 |
Run the selected model on all task frames. |
¶ Finish Job
When the task is annotated, click Finish Job. After that, the task is considered complete and can be included in the training dataset.
If you close the editor without Finish Job, the annotations may still be saved, but the task will remain incomplete. That distinction matters for the training pipeline.
¶ Models panel
When there is no trained model yet, Latest shows that the file is missing.
After the first training run, you can add Latest or choose your own .onnx. Latest always points to the newest trained ONNX model in the project.
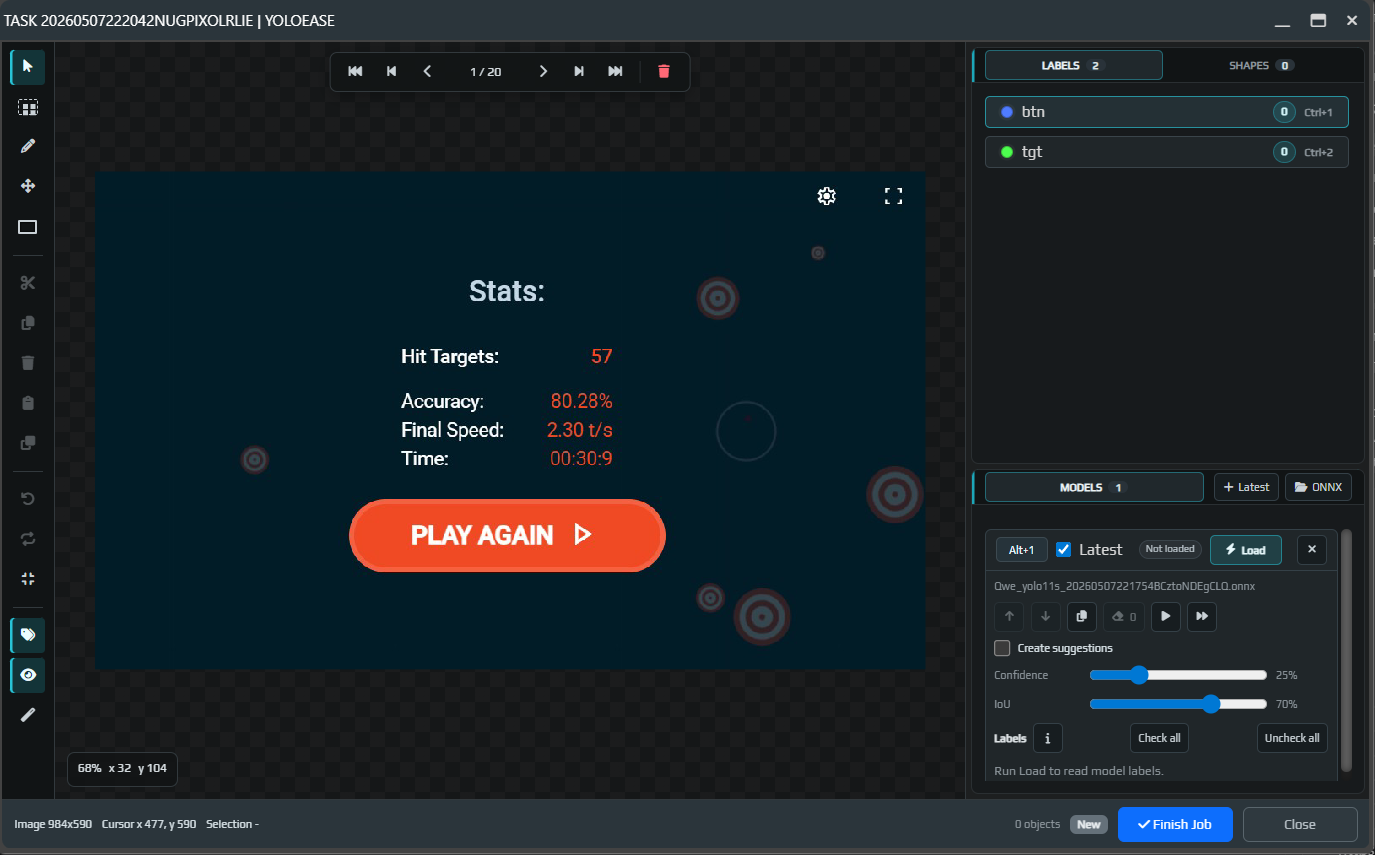
The model is not loaded automatically when you open the editor. This is intentional: ONNX and GPU libraries depend on drivers and can sometimes crash in native code. Click Load, Run current, or Run all when you are ready to start recognition.
¶ Suggestions and auto-annotation
If Create suggestions mode is enabled, the model will create suggestions that you can accept or delete. If the mode is disabled, detected objects may become boxes immediately.
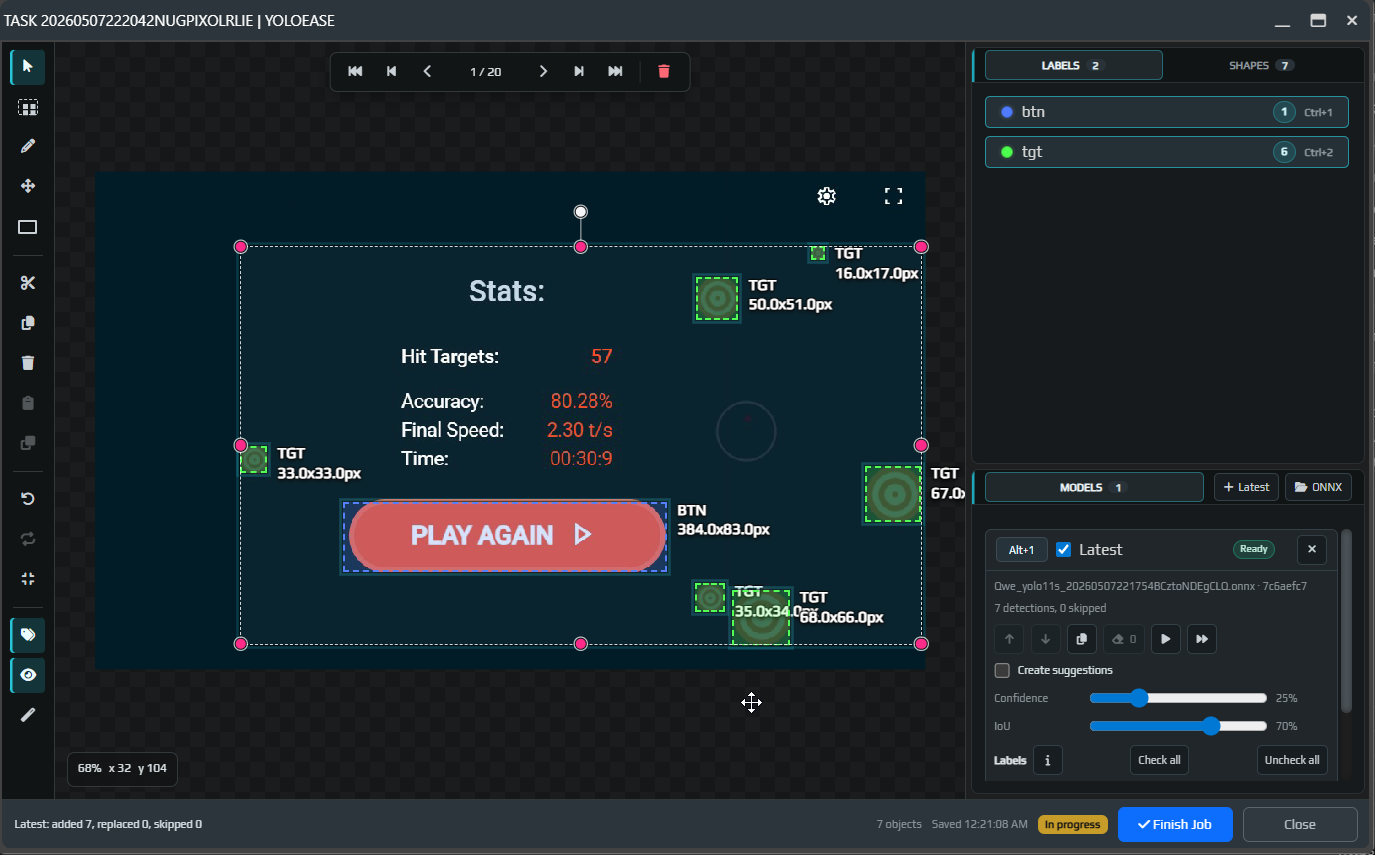
Suggestions are temporary. They are not saved and do not go into training until you click Accept or Accept all. Deleted suggestions are also excluded from the dataset.
Always review model output visually. It is better to remove a false positive right away, otherwise it will end up in the next training round as a correct example.
¶ Label mapping
If the model returns labels, they must be mapped to project labels. Enable only the rows you want to import. If the model knows a label but it should not be used in this task, disable that row.
This is especially useful when one ONNX model is reused across different projects or when you need to temporarily ignore some classes.
See also: Trainer, YOLO ONNX and model weights, EyeAuras integration.