¶ Extracting Frames from Video
YoloEase can take a video file and extract frames directly into the project storage. For the usual dataset preparation workflow, this replaces manual Python or ffmpeg scripts.
¶ How to open it
Open the Project tab and click Add Video..., or drag a video file into the add area. Common formats are supported, including mp4, mov, avi, mkv, wmv, webm, and mpg.
After you select a file, YoloEase reads its metadata and opens the Extract frames window.
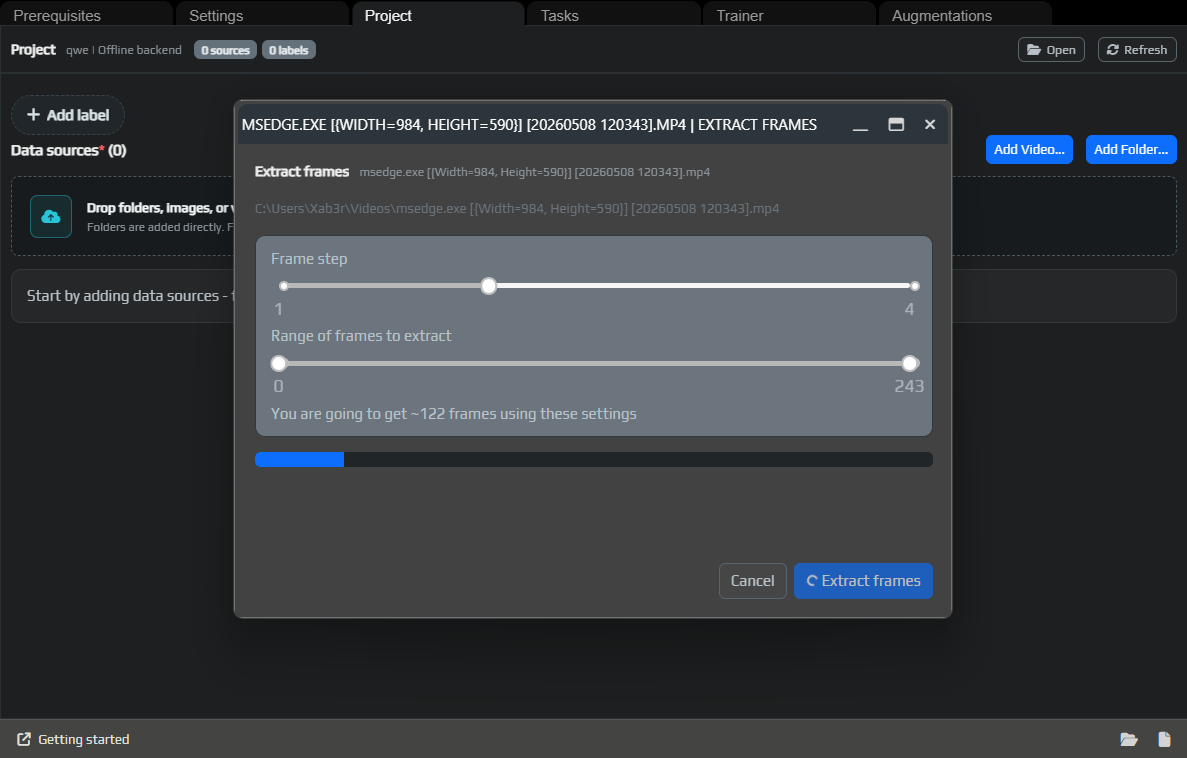
¶ Frame step
Frame step controls how often frames are extracted.
If the step is 1, YoloEase tries to extract every frame from the selected range. This can produce too many nearly identical images.
If the step is higher, for example 2, 4, or 10, YoloEase takes every Nth frame instead. This reduces dataset size and cuts down on manual work.
For screen recordings, it is often better to start with a larger step. In the AimTrainer demo, a short video was used, so it was easy to create a usable first task quickly.
¶ Frame range
Range of frames to extract limits which part of the video will be used. Use a range to remove:
- empty footage at the start of the recording;
- menus and pauses the model does not need;
- long repetitive sections;
- final frames if they belong to a different screen state.
If the model needs to understand different states, for example the gameplay screen and PLAY AGAIN, keep those states in the dataset and label them with different classes.
¶ Where the frames are saved
YoloEase saves the result into the project storage, usually under local-sources/<video name>/<range x step>, and adds that folder as a source.
If frames were already extracted earlier, YoloEase may skip duplicates and suggest changing the settings, such as the range or frame step.
¶ How many frames to extract
For the first model generation, it is usually better to start with a small batch that you can label by hand quickly. After the first model is trained, new tasks can be labeled much faster with auto-annotation.
A practical rule of thumb:
- first manual task: 5-20 frames;
- second pass: dozens of frames, now using the model;
- later passes: hundreds of frames if auto-annotation is working well;
- final pass: add frames where the model still makes mistakes.
See also: connecting data, annotation editor, Trainer.