¶ Preparing data
Before you can train a model, you need a project, labels, and images. In the example below, we record a short AimTrainer.io video through EyeAuras, extract frames in YoloEase, and add two labels: tgt for targets and btn for the button.
¶ Create a project
On the start screen, click New.... This opens a standard file save dialog. Choose where to save the .yeproj file, and YoloEase will create the project folder next to it.
A project consists of the .yeproj file and the adjacent data folder. If you move the project to another computer, move both together.
To learn more about how YoloEase stores sources and file copies inside a project, see connecting data.
¶ Check Settings
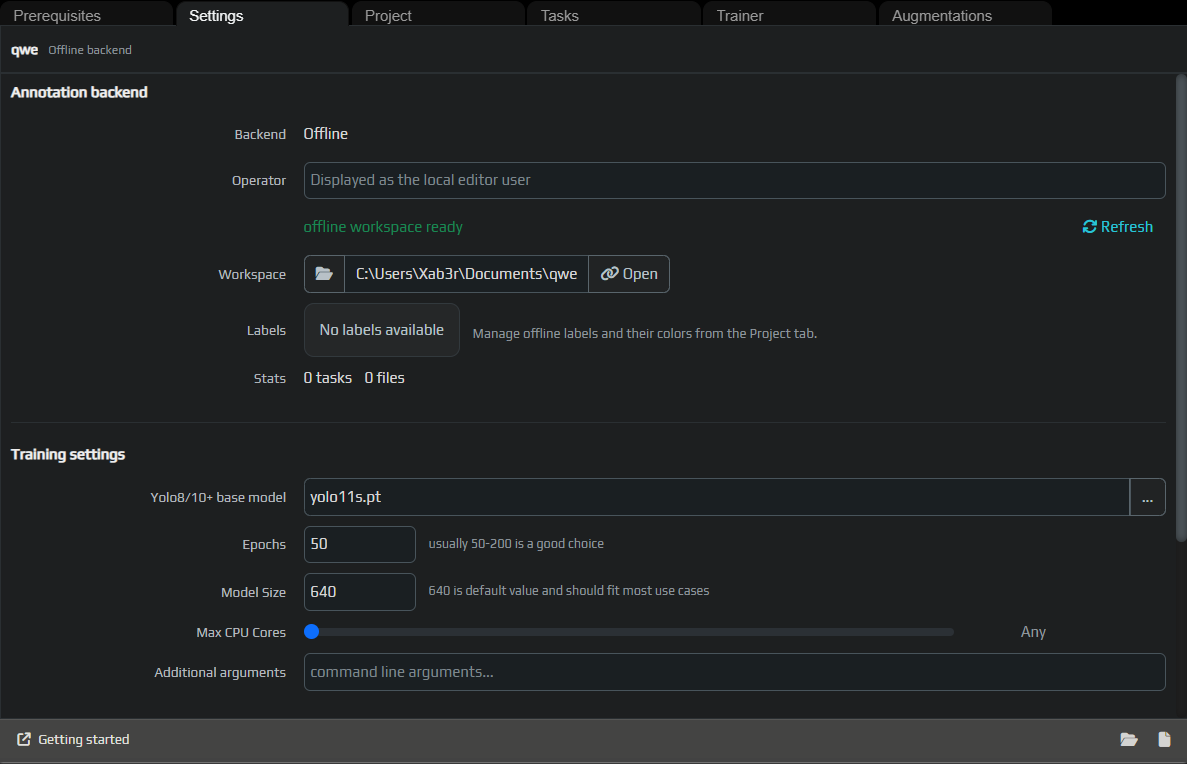
Open the Settings tab. Here you can see that the project uses the Offline backend, and the working directory is the local project folder.
In Training settings, choose the base model, number of epochs, input image size, and any extra arguments if needed. For a first pass, the default values are usually enough.
¶ Add labels
Go to the Project tab and add the labels the model should detect. In this example:
tgt— targets that should be clickedbtn— thePLAY AGAINbutton, which should be recognized separately
The label color is only for convenience in the editor. It does not affect the model.
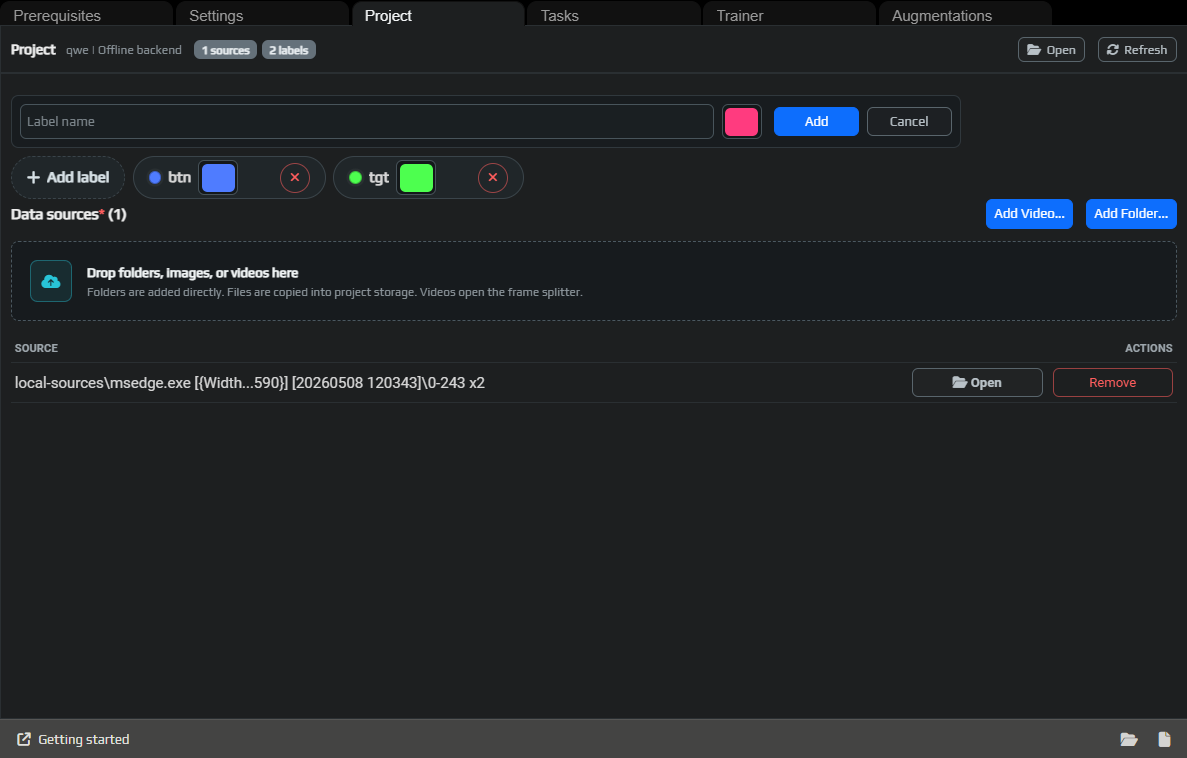
If different objects should lead to different behavior, use different labels. For example, tgt means click it, while btn means do not click targets while the button is visible.
¶ Record a video in EyeAuras
The fastest way to collect data for screen automation is to record the exact window area that EyeAuras will later see. In this example, the video is recorded through the preview in EyeAuras.
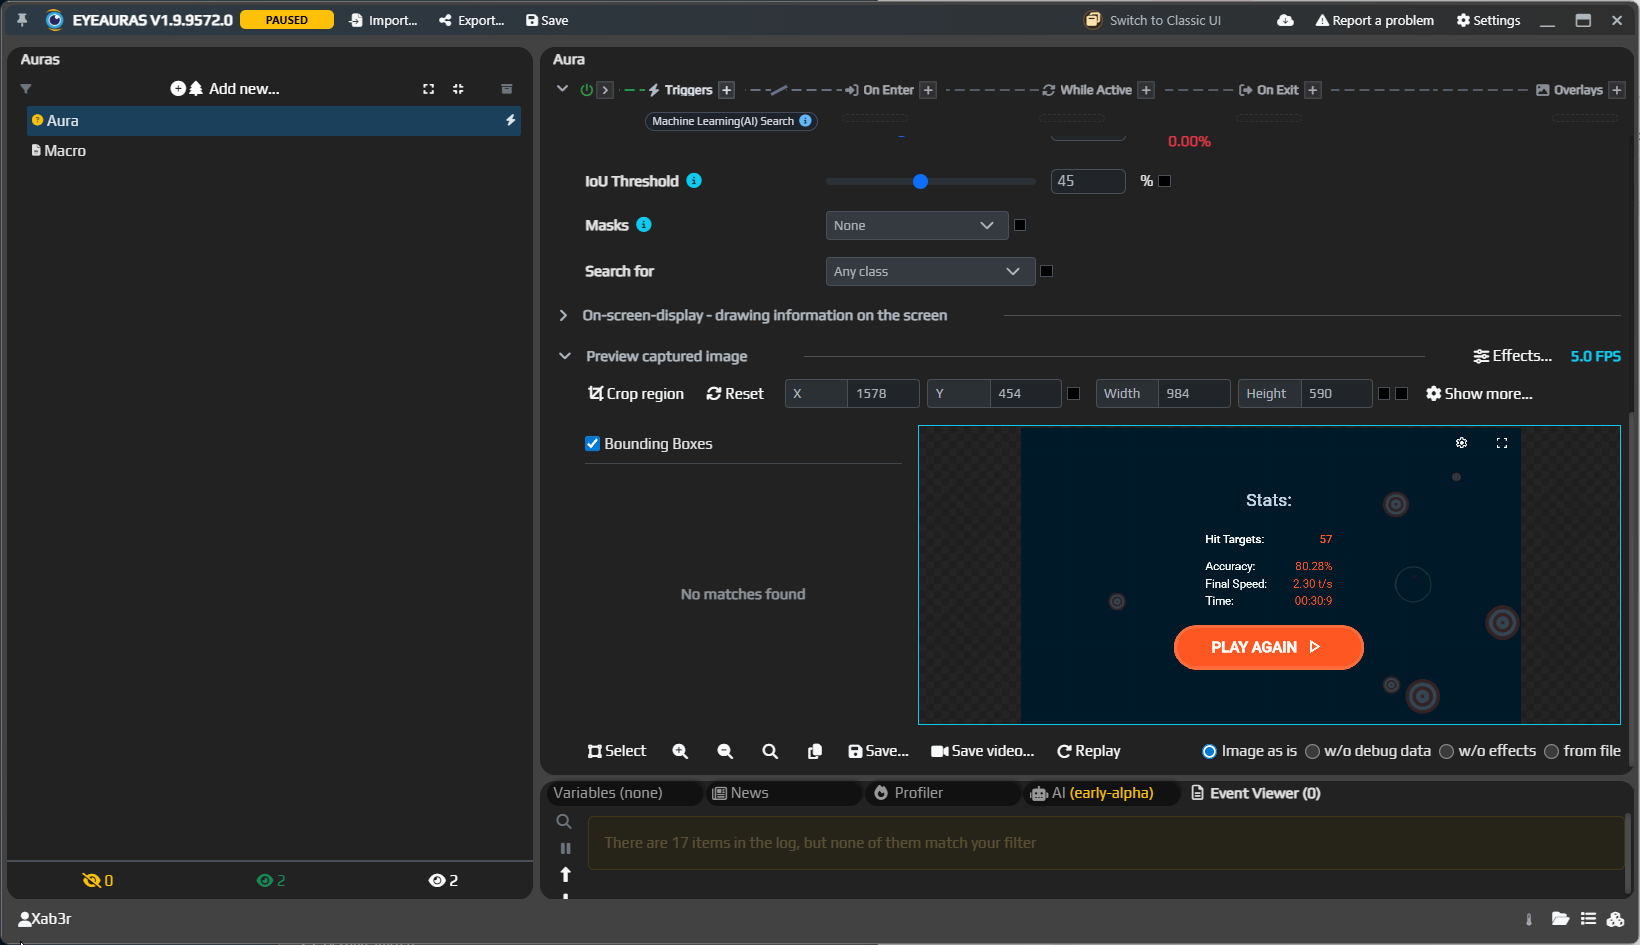
Try to record normal app or game behavior: different target positions, different UI states, misses, the victory screen, and the restart button. The model only learns from what you show it.
¶ Add a video or folder
On the Project tab, you can use:
Add Video...for a video fileAdd Folder...for a folder with ready-made images- drag and drop for folders, images, and videos
Folders are added as sources. Individual files are copied into the project storage so the project stays stable.
For details about sources, missing paths, and moving projects, see connecting data.
¶ Extract frames
If you add a video, YoloEase opens the Extract frames window. Choose the frame step and range. A smaller step gives you more similar frames in the dataset. A larger step means less manual labeling work.
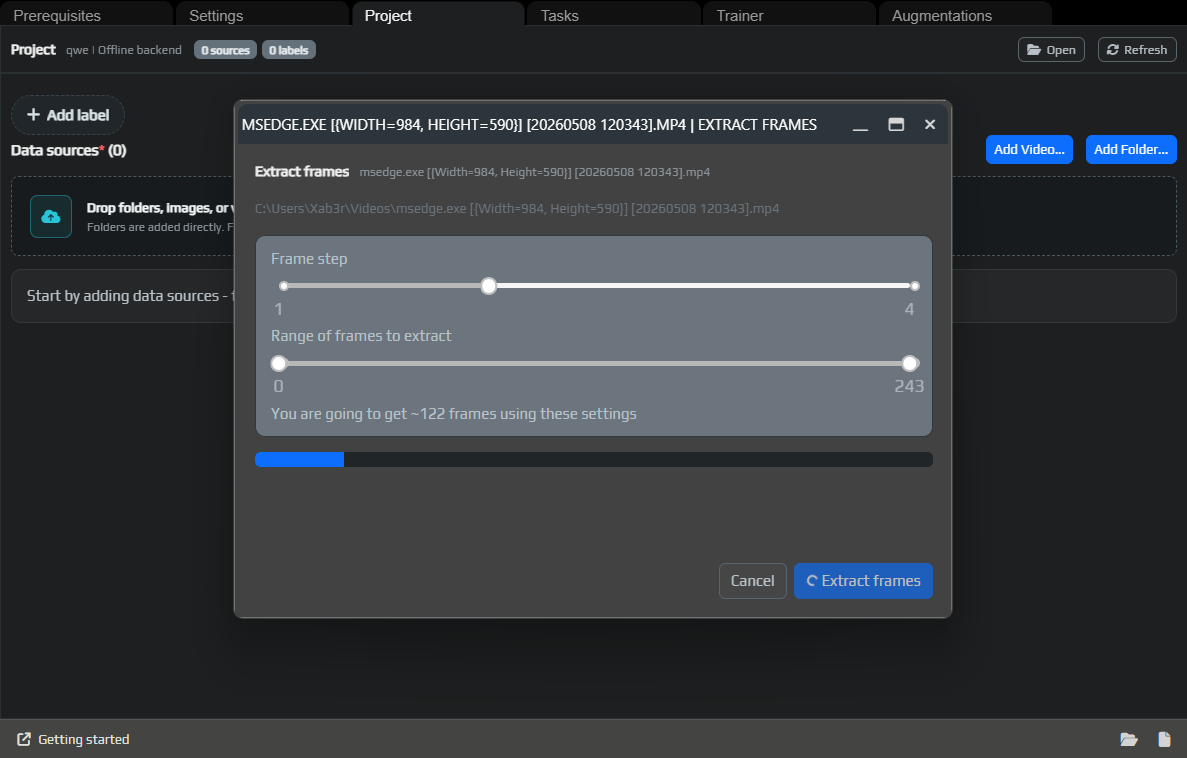
For a first pass, it is convenient to start with a small batch: enough frames for the model to see the main objects, but not so many that manual labeling takes the whole evening.
For more about frame step, range, and total frame count, see extracting frames from video.
Once the frames are added, continue to annotation and training or open the detailed page for the annotation editor.